


Views: 0 Author: Site Editor Publish Time: 2026-08-03 Origin: Site


The home fragrance and decor market relies heavily on differentiated, bespoke packaging, making custom ceramic vessels a high-value differentiator for retail brands and corporate gifting programs. Buyers and product developers must balance aesthetic vision with strict thermal safety requirements, unit economics, and manufacturing scalability. A poorly specified vessel can lead to wax adhesion failure, thermal cracking, or prohibitive shipping costs. This guide breaks down the technical evaluation of ceramic production, from base forming techniques to surface decoration, providing a framework for sourcing and scaling custom candle holders that meet commercial standards. You need to understand clay body behavior, kiln firing schedules, and glaze chemistry to avoid costly production delays. We will walk through the exact specifications required to move from a raw CAD concept to a fully realized, mass-produced vessel ready for automated wax pouring lines.
Forming Methods Dictate Scalability: Slip casting (grouting) offers the highest consistency for complex shapes at volume, while pressing is optimal for high-speed, standardized cylindrical vessels.
Format Determines Engineering: Container candles require strict thermal shock resistance for wax pooling, whereas taper and pillar holders require precise receptacle sizing and drip management.
Decoration Impacts Unit Economics: Direct-to-object (DTO) printing, pad printing, and decals provide precise brand replication for private label projects, whereas reactive and speckled glazing creates unique, artisanal variations that command premium retail pricing.
Thermal Safety is Non-Negotiable: Custom designs must account for clay body density, firing temperatures, and wall thickness to prevent thermal shock and ensure safe wax pooling.
Prototyping Mitigates Risk: Factoring in a 10–15% shrinkage rate during the kiln firing process is critical when designing molds to fit specific wax volumes, wick configurations, or standard taper bases.

Poured container candles hold molten wax directly against the vessel walls. You need uniform wall thickness, typically between 4mm and 6mm, to distribute heat evenly and prevent localized hot spots. Freestanding holders serve a different function. Taper, pillar, and ceremonial Shabbat candles sit above or within a shallow receptacle. These designs demand precise dimensional accuracy. A taper holder must grip a standard 7/8-inch (22mm) base firmly. Loose fits cause leaning, which creates uneven burning and fire hazards. Freestanding formats also require integrated drip catchers. You must calculate the volume of the drip tray to ensure it can hold the runoff from a drafty room without overflowing onto furniture.
Thermal shock resistance dictates material selection for any Ceramic Candle Holder. Firing temperatures separate porous earthenware from dense stoneware. Earthenware fires at lower temperatures (around 1,000°C). It remains porous and fragile under rapid temperature changes. Stoneware fires at much higher temperatures (up to 1,250°C), vitrifying the clay into a dense, non-porous body with less than 1% water absorption. Container formats absolutely require non-porous interiors. If molten wax seeps into unsealed earthenware, the vessel itself becomes a wick. This creates a severe fire hazard. High-fired stoneware or porcelain eliminates this risk while easily withstanding the localized heat of a burning wick. You must specify the exact clay body formulation to your manufacturing partner to ensure compliance with thermal safety standards.
Design complexity must align with manufacturing constraints. Intricate undercuts in a vessel design complicate mold removal. You will need multi-part molds, which slows down production and increases defect rates. Thin walls may look elegant, but they compromise structural integrity during transit and use. Evaluate the intended use-case early in the design phase. A heavy, reusable vessel implies longevity and justifies thicker walls and premium glazes. A lightweight seasonal gift requires optimized material usage to keep shipping weights low. You must establish a minimum draft angle of 2 to 3 degrees on vertical walls to allow the clay to release from the plaster mold smoothly. Balancing these factors ensures the final product remains both beautiful and manufacturable at scale.
Slip casting is the industry standard for complex silhouettes. The process involves pouring liquid clay, known as slip, into porous plaster molds. The slip contains deflocculants to keep the water content low while maintaining fluidity. The plaster absorbs water from the slip, leaving a solid clay shell against the mold walls. Once the shell reaches the desired thickness—usually after 15 to 20 minutes—workers pour out the excess slip. This method excels at creating hollow forms with uniform wall thickness. It allows brands to scale intricate, custom shapes that other methods simply cannot reproduce. Consistency remains high across large production runs. You must monitor the specific gravity and viscosity of the slip daily to prevent casting defects.
Industrial pressing offers unmatched speed for simple, thick-walled vessels. Hydraulic RAM presses force semi-dry clay powder (containing about 5% to 7% moisture) into steel or carbide dies. This forms the vessel in seconds under immense tonnage. It works perfectly for standardized cylindrical or square jars. Extrusion pushes wet clay through a shaped die, creating continuous profiles that workers then cut to length. Both methods offer extreme cost-efficiency. They minimize manual labor and reduce drying times significantly compared to slip casting. For large-scale retail programs relying on basic geometric shapes, pressing delivers the best unit economics. You will face higher upfront tooling costs for the steel dies, but the output speed quickly offsets this investment.
Hand-thrown or slab-built vessels cater to high-ticket, limited-edition collections. These methods rely entirely on manual craftsmanship. Artisans use pre-made templates to cut slabs of clay. They assemble these pieces at the leather-hard stage. Maintaining specific structural thicknesses, such as an 8mm wall, ensures consistency in hand-built pillar holders. Workers must score and slip the joints meticulously to prevent cracking during the drying phase. Wheel throwing creates perfectly round but uniquely varied vessels. However, manual methods introduce inherent dimensional variations. A batch of hand-thrown jars will have slightly different internal diameters. This complicates automated wax pouring and wick centering. Brands must account for these variations when planning production lines and accept wider tolerances in their quality control documents.
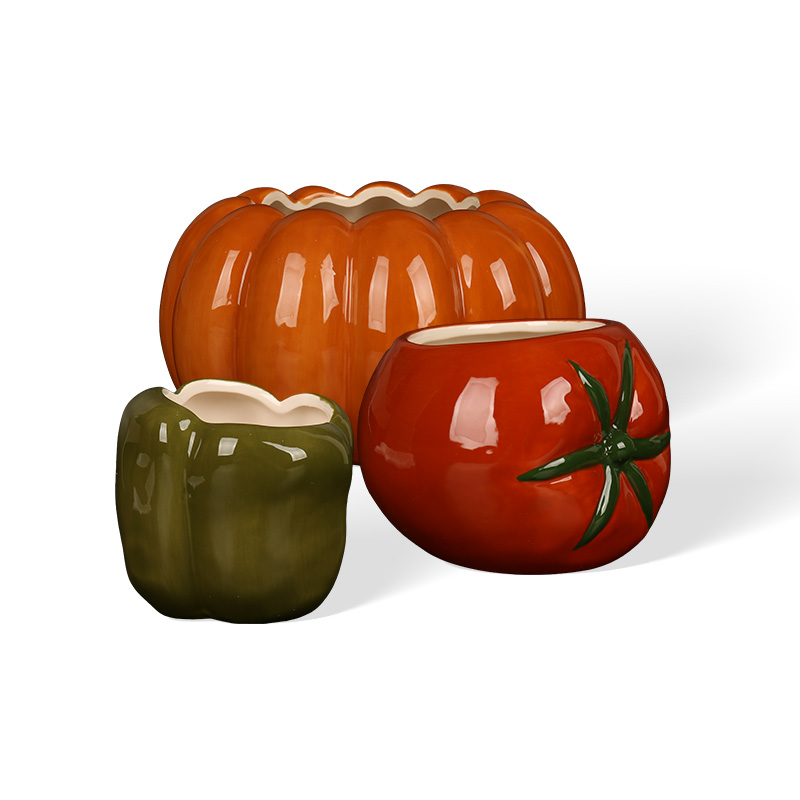
Glaze selection defines the tactile and visual identity of the vessel. Gloss glazes offer a sleek, wipeable surface that resists soot. Matte glazes provide a muted, contemporary finish but require careful formulation with matting agents like barium or zinc to avoid scuffing. Reactive and speckled glazes mimic an artisanal, hand-crafted aesthetic at scale. They react unpredictably in the kiln due to specific metal oxides, ensuring no two pieces look exactly alike. Designing a minimalist ceramic table candle holder often involves unglazed, bisque exteriors. These raw surfaces offer a beautiful, earthy texture. However, they require specific invisible silicone-based sealants. Without a sealant, raw bisque absorbs oils from fingerprints and stains easily from candle soot. You must test the sealant to ensure it does not off-gas or discolor when exposed to the heat of the candle.
Brand replication requires precise decoration methods. Water-slide decals offer permanent logo integration. Workers apply the printed decals by hand, smoothing out any air bubbles. The vessels return to the decorating kiln, firing at around 800°C. The heat burns off the covercoat and fuses the ceramic pigments directly into the glaze. Screen printing works well for single-color, high-contrast typography. It applies thick layers of ink onto flat or gently curved surfaces. Pad printing uses a flexible silicone pad to stamp ink onto the vessel. You must select the correct silicone durometer to match the curvature of the jar. This method acts as a high-speed alternative for transferring logos onto complex curves or textured surfaces where screen printing would fail.
Direct-to-object (DTO) printing utilizes UV-cured inks to apply full-color, photorealistic designs directly onto cylindrical vessels. This digital process eliminates the need for physical screens or decals. It supports rapid prototyping and variable data printing. However, UV inks sit on top of the surface rather than fusing with the glaze. You must apply an adhesion promoter or flame-treat the ceramic beforehand to prevent the ink from peeling. Evaluate the trade-offs regarding durability and heat resistance compared to kiln-fired decals. Sublimation printing uses heat to transfer dyes into a specialized polymer coating on the ceramic. It offers vibrant colors but requires vessels with perfectly straight walls for even heat press application. Any taper in the jar will cause the sublimation paper to wrinkle, ruining the design.
Hand-painted motifs add undeniable luxury and charm. Skilled artisans apply underglazes by hand before the final clear coat. They often use wax resist techniques to create sharp boundaries between different colors. This method incurs high labor costs and significantly extends lead times. Sculptural reliefs, such as fluting or embossing, integrate decoration directly into the mold. While this increases upfront tooling costs for CNC milling the master mold, it adds zero labor time during mass production. 3D textural elements catch the light and elevate the perceived value of the product without relying on complex surface printing. You must ensure the relief details are not too sharp, or the glaze will pull away from the edges during firing, leaving bare clay exposed.
Decoration Method | Best Application | Durability & Heat Resistance | Volume Suitability |
|---|---|---|---|
Kiln-Fired Decals | Complex, multi-color logos on curved surfaces | Excellent (fused into glaze) | Medium to High |
Pad Printing | Single-color logos on textured or irregular shapes | Moderate to High | High |
UV DTO Printing | Photorealistic, full-color designs on cylinders | Moderate (surface level ink) | Low to Medium |
Reactive Glazing | Artisanal, unique finishes across a product line | Excellent (inherent to vessel) | High |
Scaling a product line requires a clear understanding of order volumes. Minimum Order Quantities (MOQs) shift drastically based on the chosen customization method. Developing custom molds requires higher MOQs to absorb the initial setup labor. Factories typically require thousands of units to justify a new slip-casting line and optimize kiln space. Conversely, sourcing blank stock vessels allows for agile, low-MOQ private label home craft ornament customization. You can purchase blank ceramic jars and apply local DTO printing or decaling. This strategy reduces inventory risk and allows brands to test market demand before committing to large-scale custom manufacturing. You pay a higher unit cost for the blanks, but you avoid the heavy capital expenditure of custom tooling.
Custom silhouettes demand upfront capital for tooling. The process begins with CAD to CAM workflow to finalize the design. The factory then mills a master block mold from polyurethane or prints it using a high-resolution resin printer. From this master, they cast a case mold, which is then used to produce multiple plaster working molds. Plaster working molds have a limited lifespan. They degrade after absorbing water from the slip over 50 to 100 casting cycles. Once the details soften or the seams become too prominent, the factory must cast new working molds. You must clarify who owns the master mold and how the factory handles tooling replacement costs over the lifespan of a multi-year retail program. Get these terms in writing before paying the initial tooling invoice.
Ceramic production moves slower than plastic or metal manufacturing due to drying bottlenecks and strict firing schedules. A standard timeline begins with CAD design approval. Next, the factory produces a 3D-printed prototype to verify proportions. After approval, they create a ceramic sample to test shrinkage and glaze fit. This sampling phase takes three to four weeks. Mold making for mass production adds another two weeks. Mass production, including casting, drying, bisque firing, glazing, and final firing, typically requires 30 to 45 days. A standard tunnel kiln operates on a continuous 24-hour cycle, but the vessels must dry completely before entering, or trapped moisture will cause them to explode. Freight and customs clearance add further delays. Plan for a 90- to 120-day cycle from initial concept to final delivery.
Clay shrinks significantly as water evaporates during drying and vitrifies during firing. You must account for both wet-to-dry shrinkage and dry-to-fired shrinkage. A standard total shrinkage rate hovers between 10% and 15%. This impacts the final internal diameter required for specific wax fill weights. If you need a vessel to hold exactly 8 ounces of wax, the wet clay mold must be oversized to compensate. Shrinkage calculations are absolutely critical for taper holders. If the receptacle shrinks too much, standard candles will not fit. If it shrinks too little, the candles will wobble. Warping occurs if the vessel walls are uneven or if the kiln heats too rapidly. Clay has a memory; if it is bent and forced back into shape during the wet stage, it will warp back during firing. Strict temperature controls and the use of flat setter plates prevent asymmetrical shrinking.
Automated wax pouring lines demand tight tolerances. Uneven interior bases cause off-center wicks. An off-center wick melts the wax unevenly, leaving a thick wall of unburned wax on one side and overheating the ceramic on the other. This creates a severe thermal shock risk. You must ensure the interior bottom is perfectly flat to allow wick stickers to adhere properly. The vessel must also feature a flat, level rim. Automated filling lines use the rim as a reference point for fill heights. If the rim is warped, the fill levels will vary, causing overflow or underfilling. Furthermore, level rims are necessary for secure lid fitment. A warped rim prevents wooden or metal lids from sealing properly, leading to fragrance loss and an unprofessional retail presentation. Specify a rim flatness tolerance of +/- 1mm in your quality control documents.
Ceramics are inherently fragile. Standard corrugated boxes offer insufficient protection for retail distribution. You must evaluate packaging against strict drop-test standards, such as ISTA 3A. Recommend custom EPS foam, molded pulp, or die-cut corrugated inserts to isolate the vessel. Molded pulp offers a sustainable alternative to foam while providing excellent shock absorption. The packaging must prevent the vessel from shifting during transit. It must also protect the delicate rim from impact. If you use corrugated inserts, specify double-wall construction with a B-flute or C-flute profile for maximum crush resistance. Investing in robust internal packaging minimizes breakage rates, protects your margins, and ensures a positive unboxing experience for the end consumer. Do not cut costs on transit packaging, as replacement shipments will destroy your profitability.
Draft a comprehensive technical pack detailing exact dimensions, target wax fill volumes, and specific glaze Pantone references before contacting suppliers.
Request physical samples of both the raw bisque and the glazed finish to test wax adhesion and thermal shock resistance in your own facility.
Design your vessel with a 10-15% oversize allowance in CAD to account for kiln shrinkage, ensuring your final product fits standard wicks and lids.
Audit potential manufacturing partners based on their in-house capabilities, prioritizing those who manage both mold-making and surface decoration under one roof.
A: High-fired stoneware and porcelain are the best choices. They fire at elevated temperatures, which vitrifies the clay and creates a dense, non-porous structure. This provides superior thermal shock resistance, ensuring the vessel will not crack under the heat of a burning wick. It also prevents molten wax from seeping into the vessel walls.
A: Ceramic vessels typically shrink between 10% and 15% during the drying and kiln-firing processes. Water evaporates, and the clay particles fuse together. You must design the initial master molds larger than the final target dimensions to account for this predictable reduction in size.
A: You must calculate the exact post-firing shrinkage rate of your specific clay body. To ensure a standard 7/8-inch taper candle fits perfectly without leaning, the wet clay receptacle must be oversized by the exact shrinkage percentage. Prototyping is required to dial in the final fired diameter.
A: Yes. Direct-to-object (DTO) UV printing and sublimation offer full-color, photorealistic designs. However, kiln-fired water-slide decals provide better long-term durability and heat resistance. Pad printing works well for simple colors on curved surfaces, but decals remain the standard for complex, permanent color integration.
A: Unglazed (bisque) exteriors are safe, but the interior must be sealed if used as a container candle. Raw ceramic is porous and will absorb molten wax, creating a fire hazard. Even for freestanding holders, unglazed surfaces require an invisible sealant to prevent soot stains and fingerprint marks.
A: Ceramic shrinks slightly unpredictably, making perfect lid fits challenging. You must enforce tight manufacturing tolerances for the rim diameter. Additionally, always use lids with flexible silicone gaskets. The silicone compresses to absorb minor dimensional variations, ensuring an airtight seal that preserves the candle's fragrance.


